The Most Useful Grenades Without Jumpthrow on Dust 2, Ancient, and Vertigo
August 28, 2024
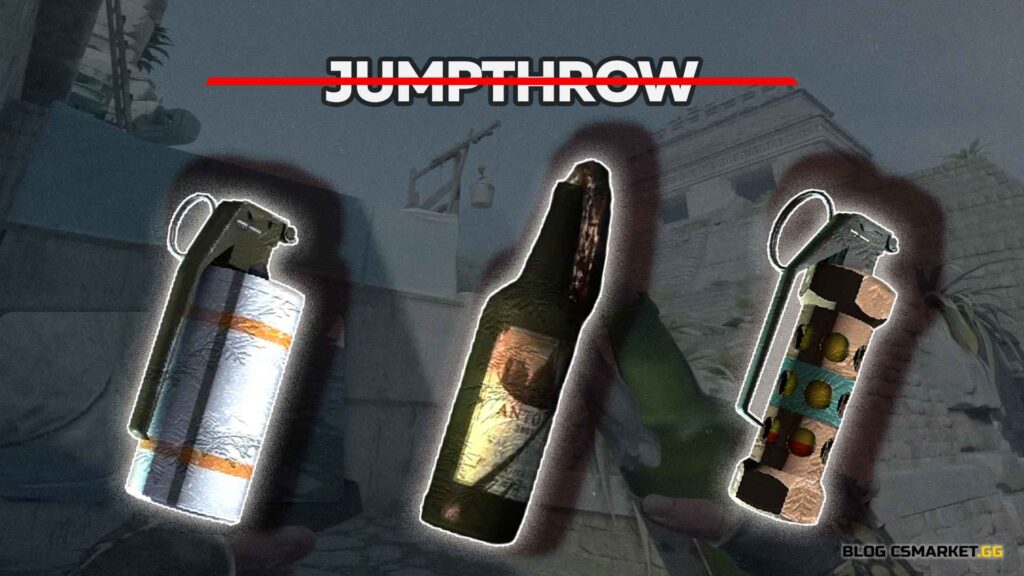
After one of the updates in Counter-Strike 2, the developers removed the ability to bind jumpthrow for grenade throws. Now, you need to hold down the left mouse button, jump, and release it at the right moment, which increases the chances of missing. Some professional players say that this is just another skill element that needs to be mastered and welcomed the change. However, regular players often find themselves in matches without highly skilled teammates, so servers were chaotic at first. As a result, people started looking for alternative ways to throw useful grenades without jumping. Today, we’ll show you such grenades on the maps Dust 2, Ancient, and Vertigo.
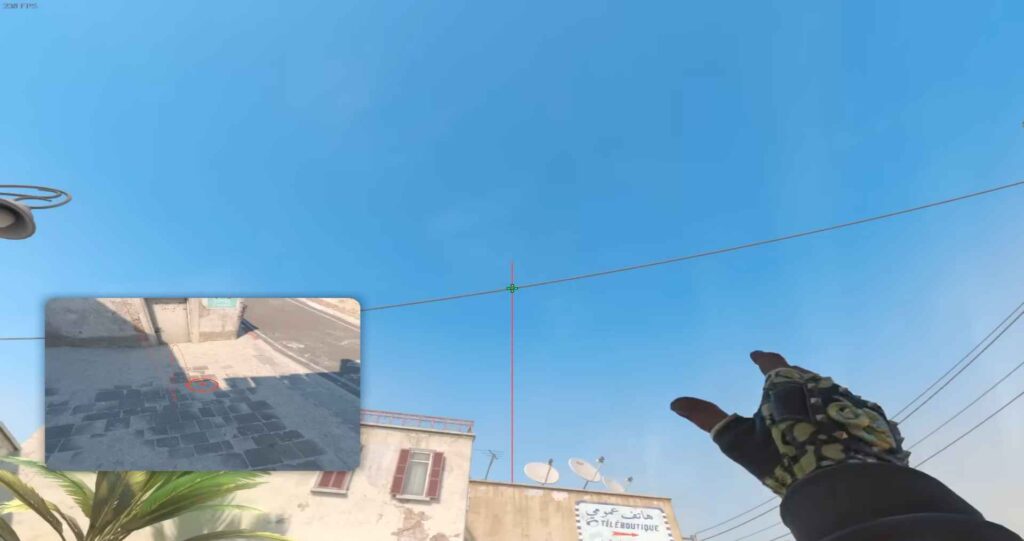
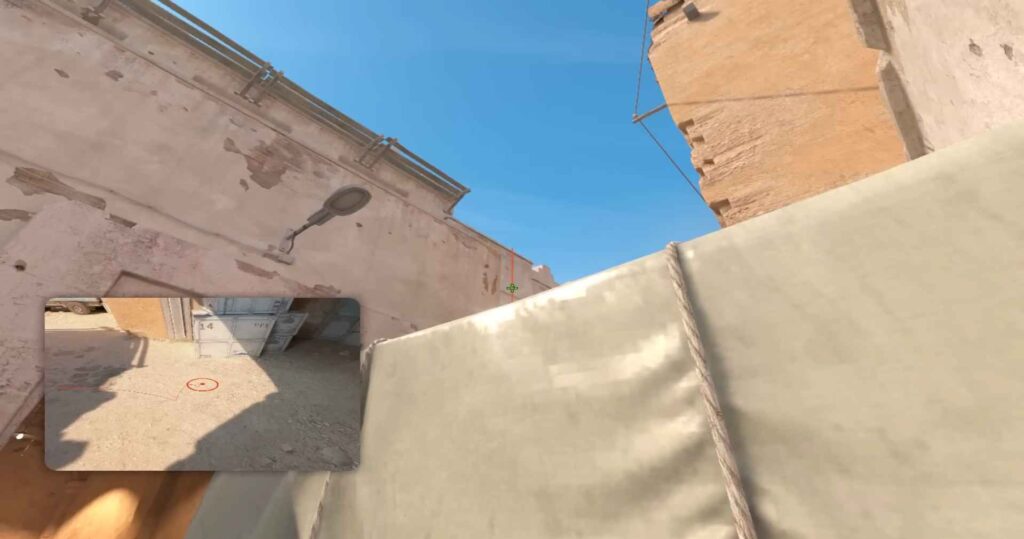
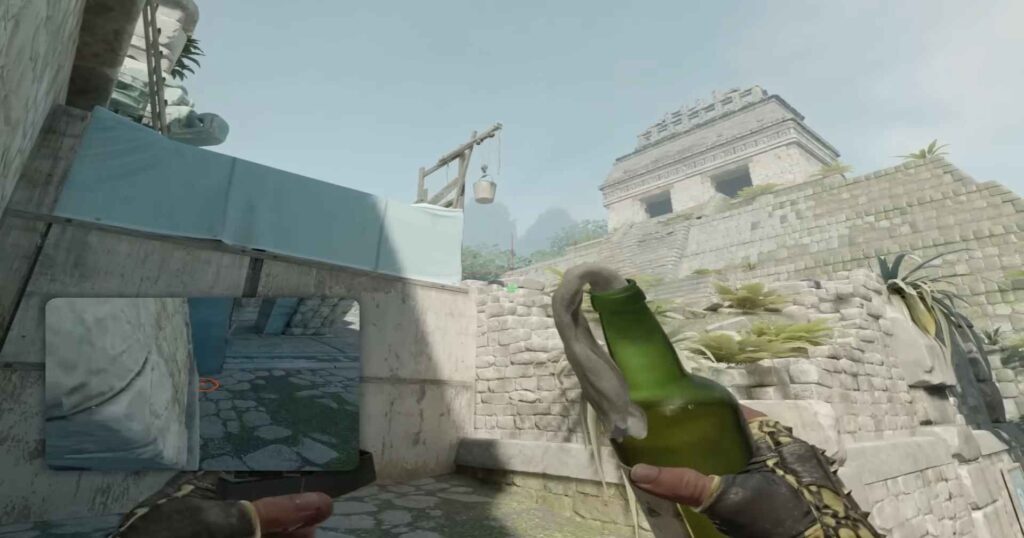
Dust 2 A Site. Smoke for CT to Cross to the Site.
A grenade without which playing Dust 2 seems impossible. Getting from long to A site is nearly impossible without this smoke, which is why in CS, players would often throw two smokes to increase their chances of successfully crossing the gap. In CS2, with the new smoke mechanics, one is enough, and the most popular method is to bounce the grenade off the tooth graffiti. However, without jumpthrow, this isn’t as effective for the attackers and allows the defenders to counter more easily. We suggest using a more reliable method by aiming at the wire from the barrel. The smoke will land deep enough to block the view from both CT and short.
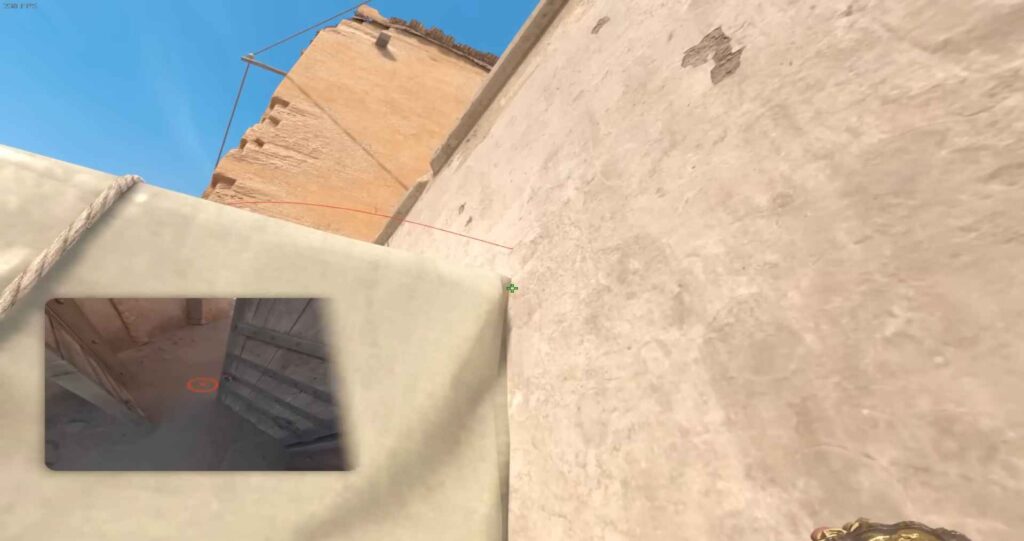
Dust 2 A Site. Deep CT Smoke.
An alternative version of the smoke, often used in CS, but it lands much deeper. When exiting doors, go to the left wall made of concrete bars and aim as shown in the image. This smoke significantly limits the defenders’ actions during retakes and prevents them from taking the KQLY position, making the site retake more dangerous. Use it when you control short and are splitting A from long with your teammates.
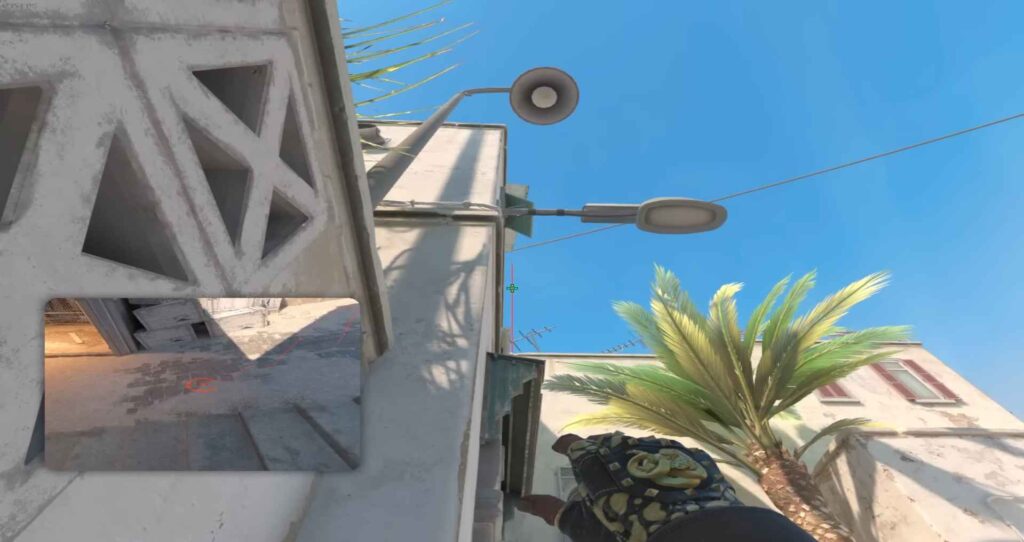
Dust 2 A Site. Smoke for Short Push.
If you don’t have information on the site and are worried about an AWP on Goose or an opponent on the ramp, this grenade will help you take deeper positions on short. The smoke is also used for finding a one-way on the box, but it’s not as reliable in CS2. Dropping into CT is another possible option with this smoke, making it a versatile and useful grenade. To throw it, stand in the middle of the iron fence by the left wall and aim at the rectangular spot above the window.
Dust 2 Mid. CT Smoke for B Push.
Another legendary grenade that hasn’t changed much since CS but is often forgotten due to the open skyboxes and new alternatives. This smoke cuts off more than half the map and forces opponents to worry about the B site. It can be thrown for mid control and a B split, or as part of a fake leading to long or short. Press against the box in front of the double doors in mid, find the noticeable spot, and the smoke will perfectly cover CT’s view.
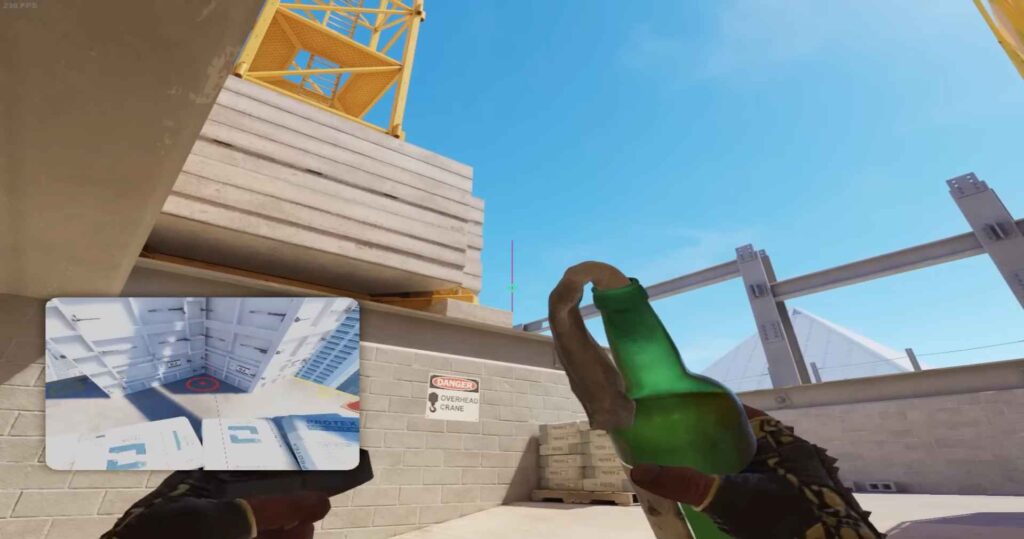
Dust 2 Mid. Instant Flash for Mid Push.
From the same position, you can throw the perfect grenade that’s impossible for the opponent to dodge, regardless of their location. Throw the flash off the wall as shown in the screenshot, and it will explode right between the doors. This flash is often thrown for your own push, which is important in solo queue games. There aren’t many instant flashes you can throw for yourself, so make sure to use it.
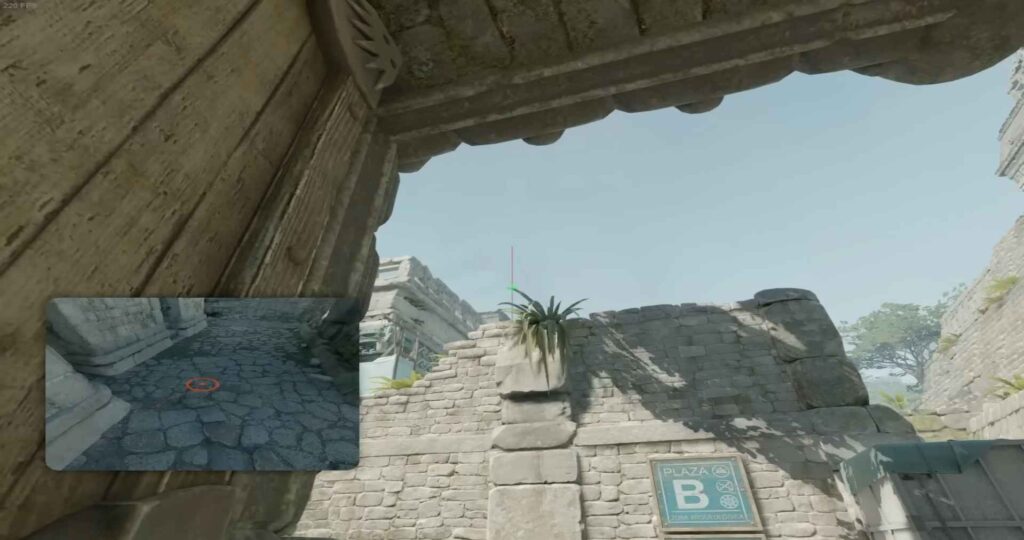
Ancient B Site. Smoke for Dark.
Blocking off this area is crucial not only when entering the site but also when holding it afterward. Defenders often rotate from this position and have a great view of any spot on the open B site. Throw the grenade by pressing against the left side of the door and aiming at the top leaf. While you can’t be seen by opponents from mid or cave, it’s better to have a teammate covering and controlling enemy aggression.
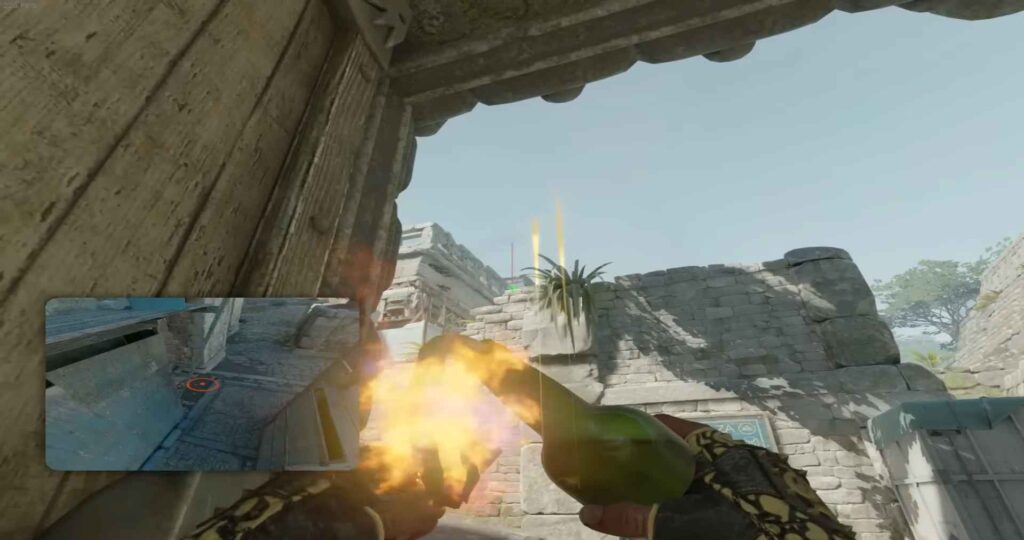
Ancient B Site. Molotov for Cave and Behind Pillar.
The previous lineup can also be used for a second grenade that provides information about opponents behind the pillar and blocks assistance from a player in cave. This is a great molotov for splitting the site, which works excellently when combined with the previous smoke. We highly recommend using both grenades.
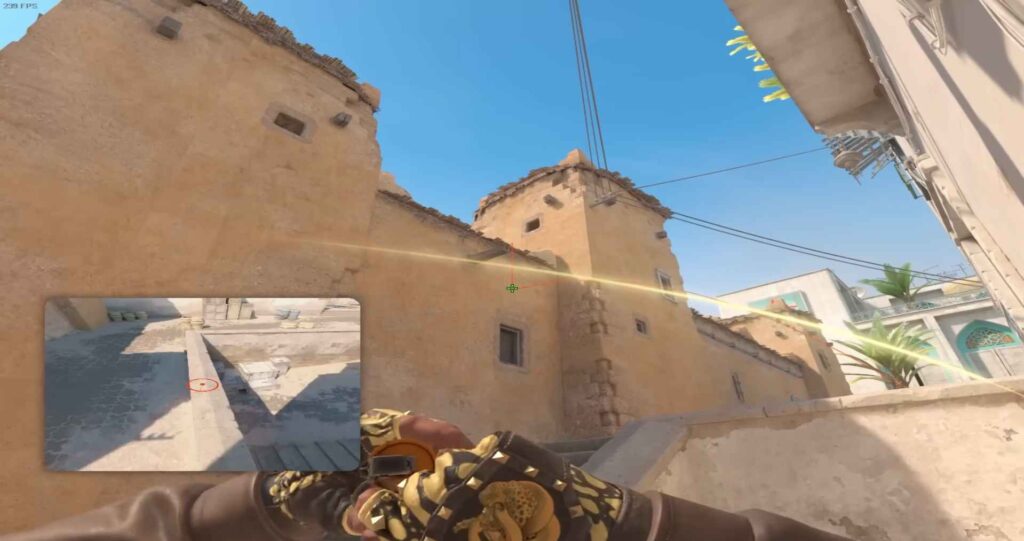
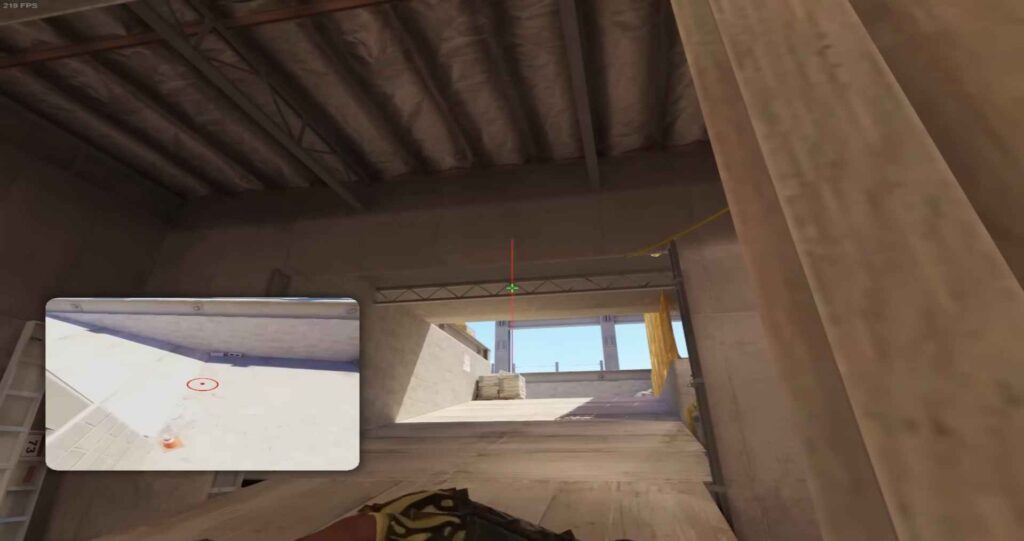
Ancient B Site. Molotov for the Hidden Spot.
A very sneaky position that attackers often overlook. It’s also a great off-angle for defenders, allowing multiple kills from here. To avoid this situation, especially during early rushes, don’t hesitate to throw a molotov into this spot. Go to the small depression near the wooden boards on short, stand in the corner, and aim as shown in the image. The grenade will ricochet off the texture and burn out the dangerous spot. The wood is also easily penetrated, so you can finish off the opponent if you hear them taking fire damage.
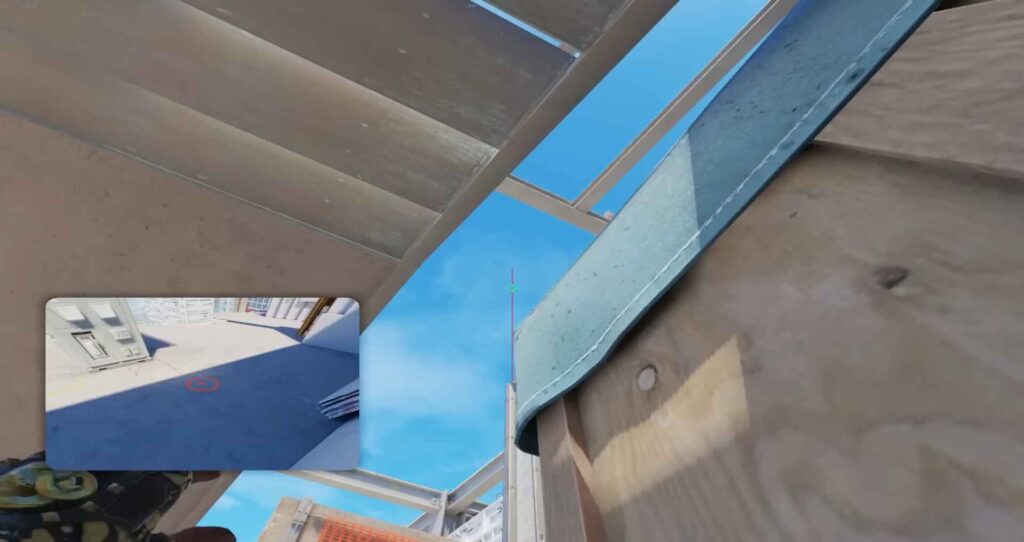
Vertigo B Site. Smoke for the Transformer.
A highly useful smoke for attackers, as it creates a lot of trouble for defenders. The smoke pops near the mid ramp, blocking the view not only for CT but also for players rotating. Stand near the right side of the box under the stairs and aim slightly above the corner. From this same position, you can throw a couple of flashes behind your teammates to avoid blinding them and help eliminate enemies.
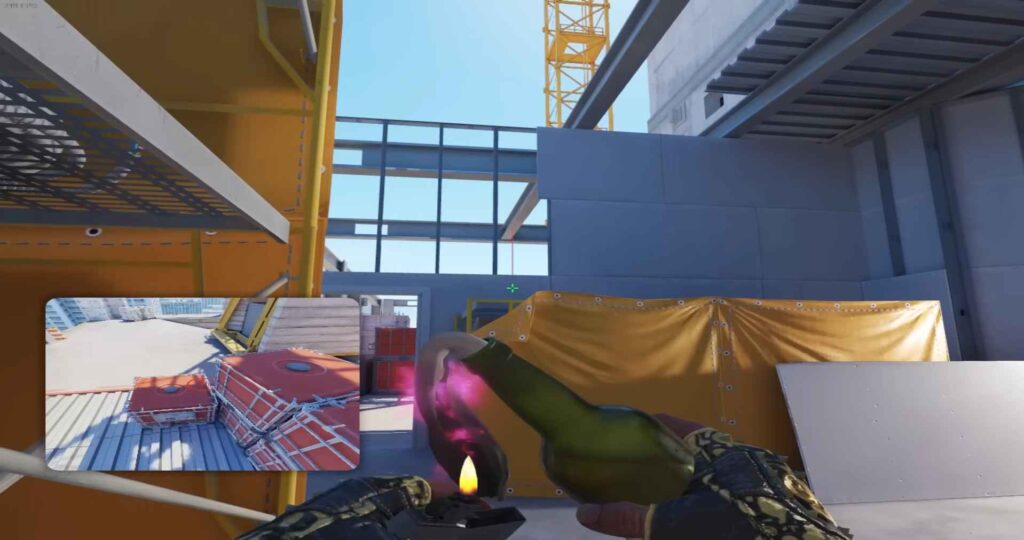
Vertigo A Site. Molotov for Retake.
Most defensive grenades are thrown intuitively and rarely require precise lineups. However, this molotov is so useful that learning it ensures you won’t allow the opponent to plant the bomb even if you’ve lost control of the site. It’s thrown from a safe position and covers the entire bomb plant area with fire. Even if the terrorists manage to plant, they’ll struggle to survive the molotov. You can also follow it up with a HE grenade for additional damage and to slow down enemy movement in the flames.
Vertigo A Site. Instant Flash for Ramp.
This position is monitored by the defense from multiple angles, and entering without a flash would be a gift. Since the position is rather limited and doesn’t have an open skybox, throwing a successful flash from a safe spot without a precise lineup can be tricky. So, remember this lineup, which is used even by professional players, as they haven’t found anything better yet.
Vertigo A Site. Molotov for Cement.
Without a doubt, this grenade can be thrown intuitively, but sometimes it doesn’t spread properly, and a supposedly cleared position can suddenly ruin the whole round. To avoid this, it’s better to practice a few times and be confident in your future pushes onto A site.